Removing the old bellows
Rotate the focus wheel to close-up. Undo the shutter ring nut with a lens spanner with 'points'. A needle-nose pliers may do it unless it is very tight, but in any case take care not to touch the rear lens. Do not be tempted to remove the rear lens element as this would make the shutter vulnerable to damage.
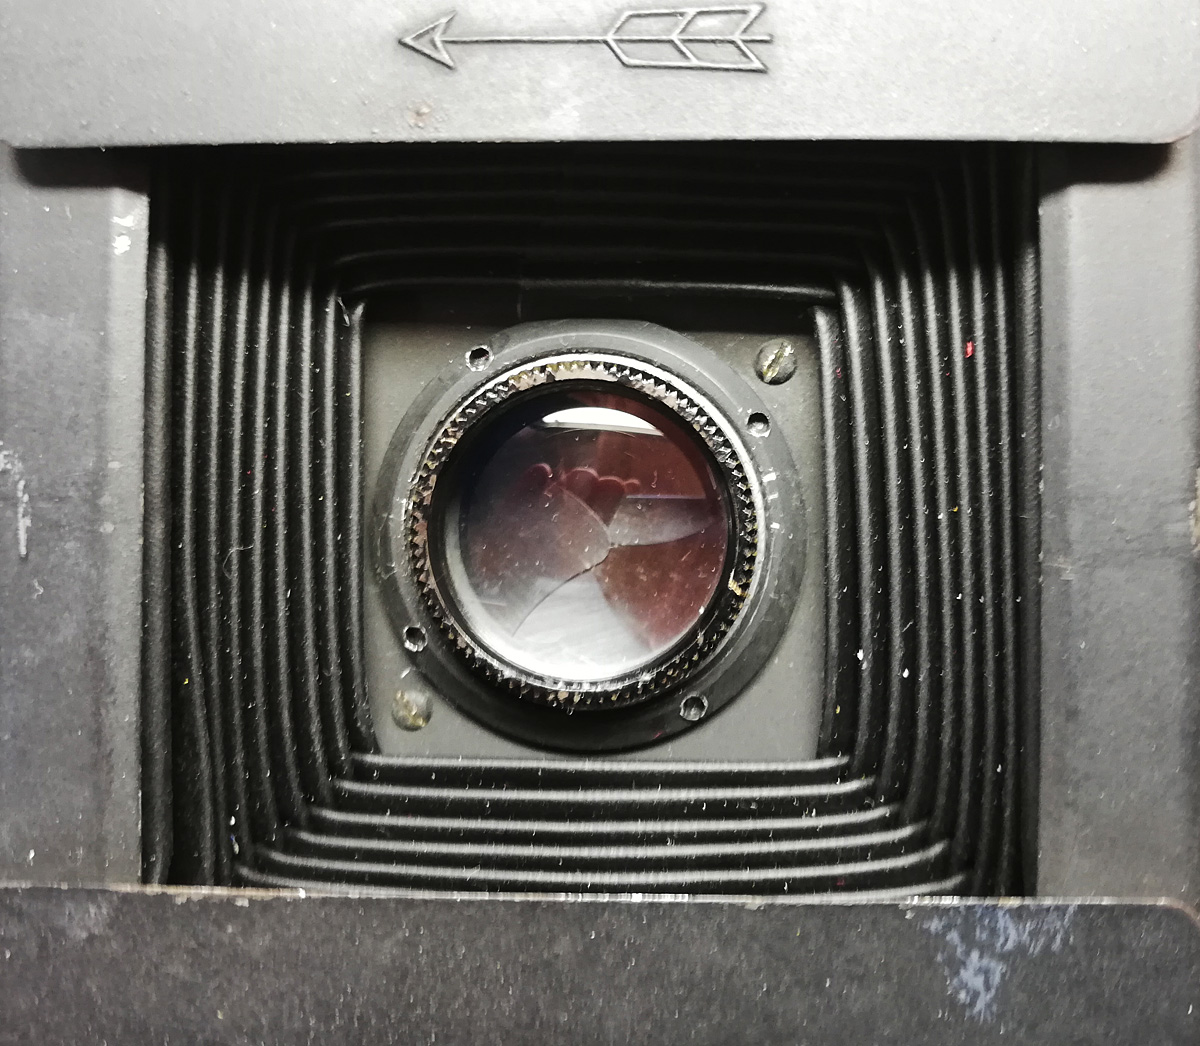
Note that the later Automat versions have a spring connecting the cocking ring of the shutter to a small stub on the bottom corner of the front standard. Take every care to keep the shutter flush against the standard when you remove the retaining ring nut so that the spring doesn't stretch or fall out - though if it does come off, the end loop on the spring can be hooked over the stub again after you reattach the shutter. You can replace the bellows with the shutter sitting loose in the front of the camera body if you protect the front and rear of the lens with clean pads of soft paper.
Otherwise, remove the shutter from the front, taking care to keep any shim in place. Put the ring nut back on for safe keeping.
Rotate the focus wheel to Infinity. Note how the long silver springs hook over a black metal catch on the film gate, at both top and bottom under the edges of the frame. Each end of the springs sits under a roller cam.
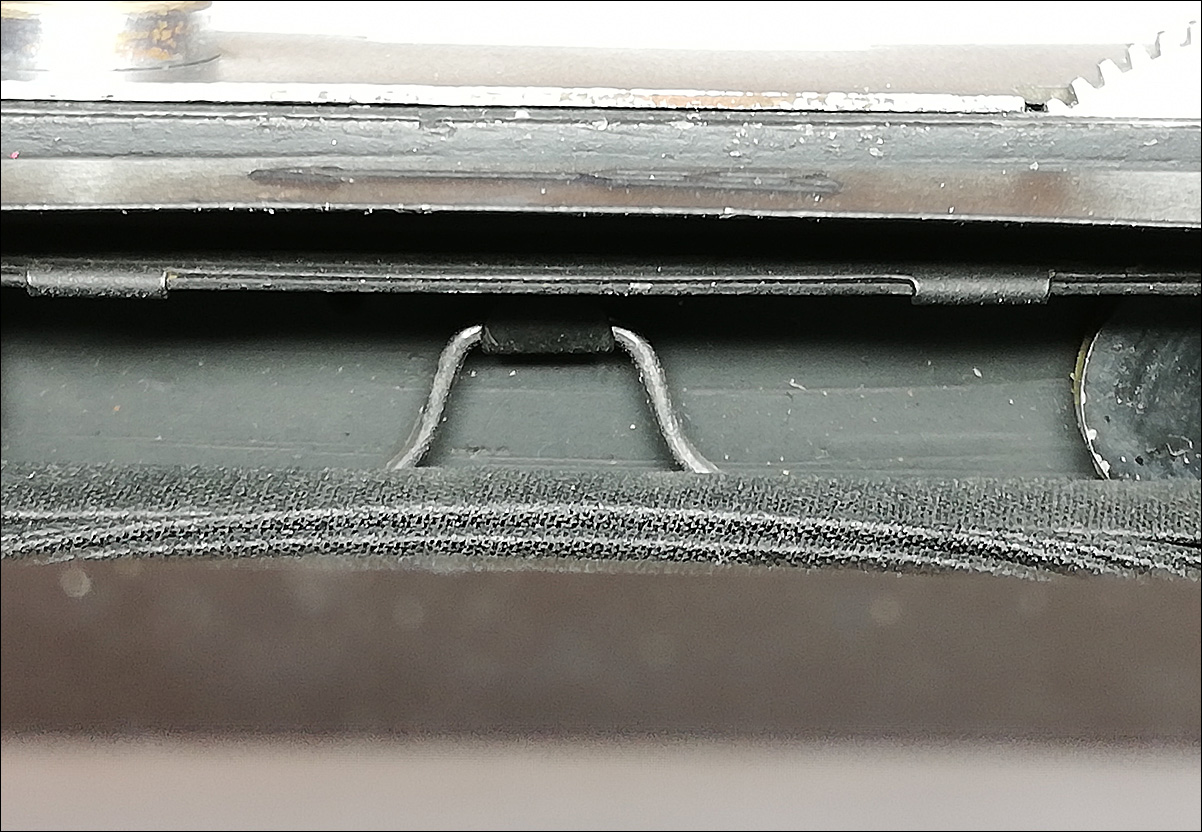
First slide each end out from under the groove of the cam with a thin probe. A good pair of needle-nose pliers allows you to grip the spring near the middle and lift it upwards and outwards over the lip of the catch. You can let each spring fall into the channel behind.
Lift out the film gate.
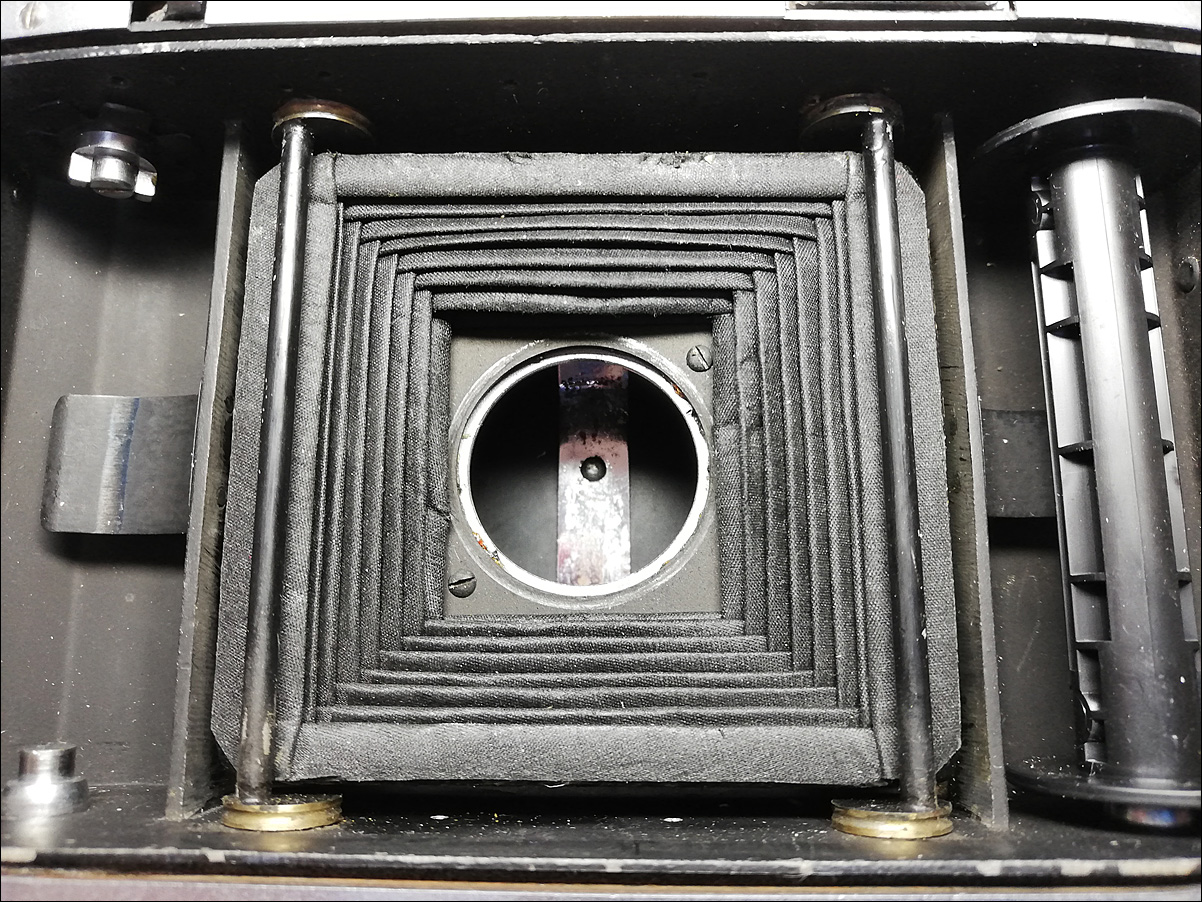
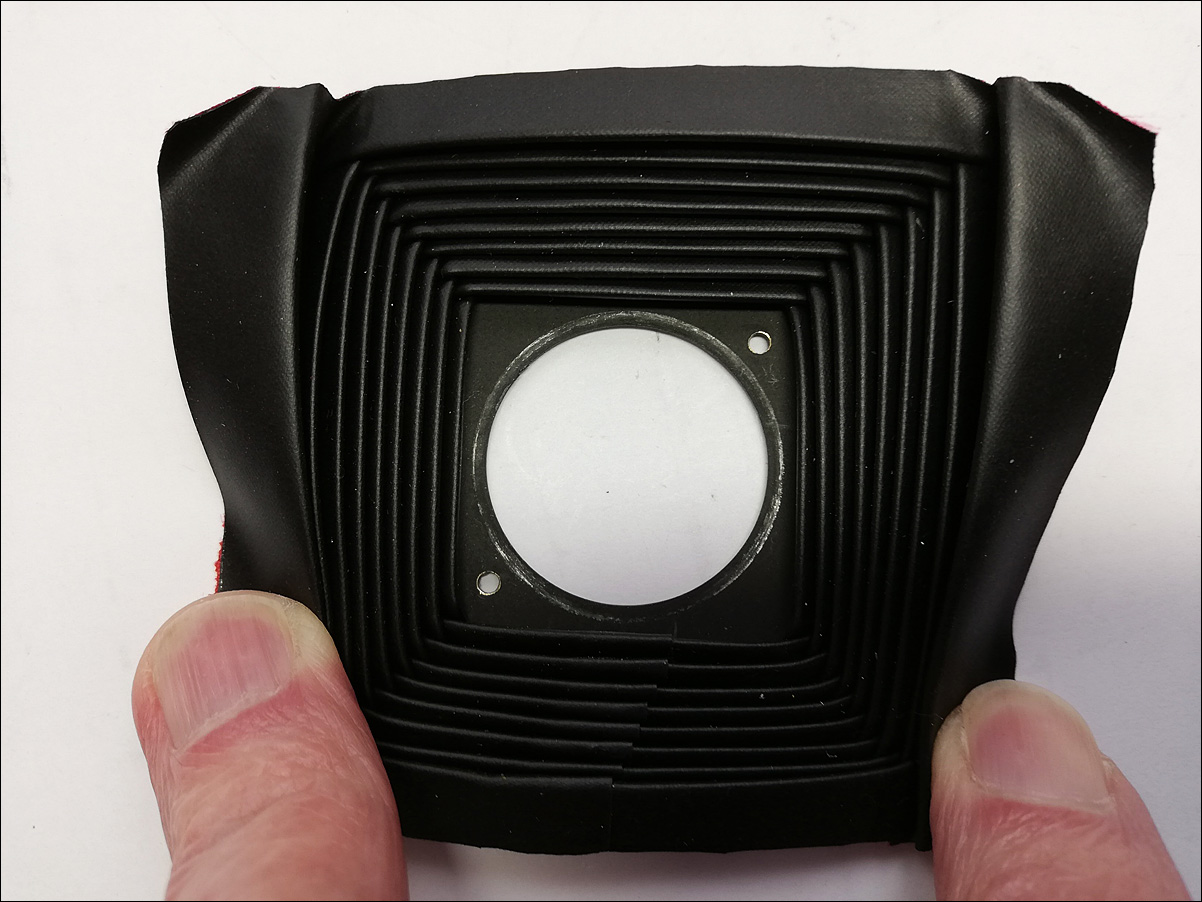
Rotate the focus wheel to close-up again. In the open back you can see the matt black front disk of the bellows. Mark the top with a pencil.
Note the two small screws that attach the bellows to the front standard. Undo them with a jeweller's screwdriver. They are very small, so keep them safe.
Take a photo of the old bellows in their original position so you have a record of how neat each corner should be for when you are reinstalling.
The old bellows are attached to the body with glue, usually water-based or possibly shellac. It's not good to introduce water onto the body so it is best to use a dental probe to scrape under each rib to lift them away. Open the front of the camera and pull the bellows out. Check that the return spring of the shutter lever remains in place at the base of the door.
The old glue should be cleaned off completely and any dust removed from the interior surfaces. Acetone on a cotton bud should soften the glue, then scrape it, paying special attention to the corners under the rollers, vacuum, and wipe down the inside.
The front disk must be removed from the old bellows and cleaned up. Check that the pencil mark indicating the top is still clear.
Preparing and fitting the new bellows
The flaps at the front end of the bellows will need to be trimmed with small curved nail scissors. Bearing in mind that the matt black side faces the film and the external bellows seam faces the door of the camera, place the disk under the top flaps in the correct orientation. Cut the ends of the two longer sides diagonally and cut around the curve. Make an extra small cut to make the screw holes visible. Bend the remaining two flaps down and trim as necessary. These two flaps should butt against the first two, or just slightly overlap.
Use a little contact cement/adhesive to attach the flaps to the disk. An ordinary supermarket tube of glue is usually fine, as long as it is clean to work with. Double sided sticky tape can also work well for this task. Superglue is not advised. Leave the bellows under pressure until it is dry.
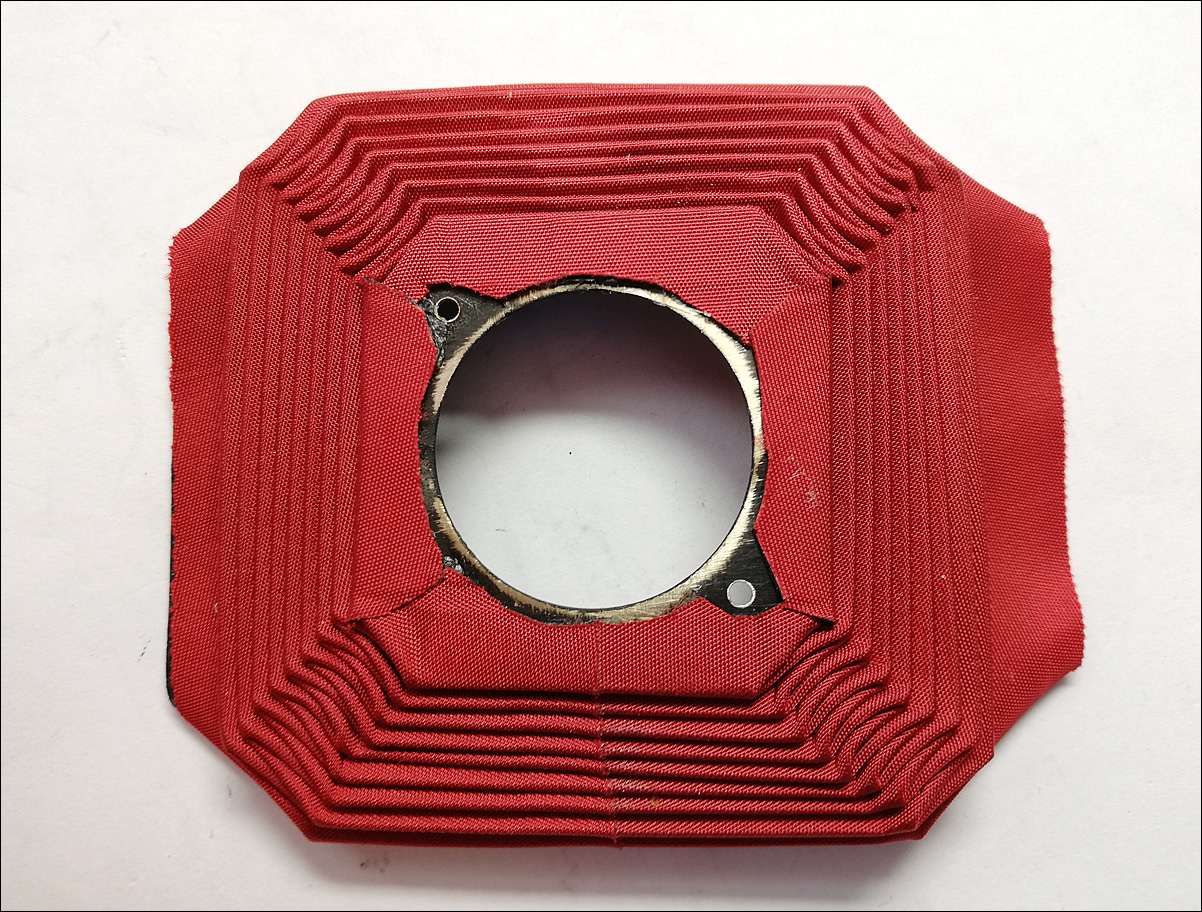
Look carefully at how the flaps at the sides will go under the two rollers. It is just two layers of fabric without any card rib inside so that it will fit under the rollers with ease.
It's easiest to introduce the bellows through the open front, so that only the end ribs and side flaps will come through the frame. Try the bellows in position before gluing.
Note that the frame has cut-out shapes at each corner. Push the side flaps under the rollers but don't pull them tight yet. Lift the top and bottom ribs over the frame edges. Working along the top and the bottom, use a fine blunt probe to push the fabric into these corners, ensuring that the side flaps overlay the corners as the original bellows did.
Check that the bellows are compressing evenly on all four sides.
When ready, glue the top and bottom first. Spread glue onto the frame, press the rib down and keep it under pressure for several minutes. You can roll each side flap up over the roller to spread glue under it and then press it down. Trim off the edges - small angled bandage scissors are useful for this. Check that no stray glue is left on the rollers.
Note that the Mamiya does not have a film gate that seals the bellows in place and relies entirely on the glue to stay put. The new bellows must look as close as possible to the old ones in how the corners are covered and glued down.
Place the film gate into position and shift the focus to Infinity. Tilt the body forwards a little so that the top of one of the long springs becomes visible. You can use a probe to pull it forward. Now use the probe to lift the spring slightly so you can grip it with the needle-nose pliers. It may be helpful to push the ends of a spring out from under the two cams, so that the ends sit just beside them. Lift the top of the spring over each of the black catches. Use the probe again to push each end of the springs under grooves of the roller cams. Repeat for the second long spring.
Join the bellows to the front standard with the two small screws and refit the shutter, taking care that the locating pin on the rear of the shutter fits into its slot. With the Automat, check that the winding lever beneath the shutter is correctly engaged.
Test everything, and go shoot something.